Fields
All fields can be found and changed in the task details pane. Click on any task to open it.
Task location
Each task is in a project. If you work with boards, then in addition to the project, a board and a column are associated with the task. Together, they indicate the location of the task.
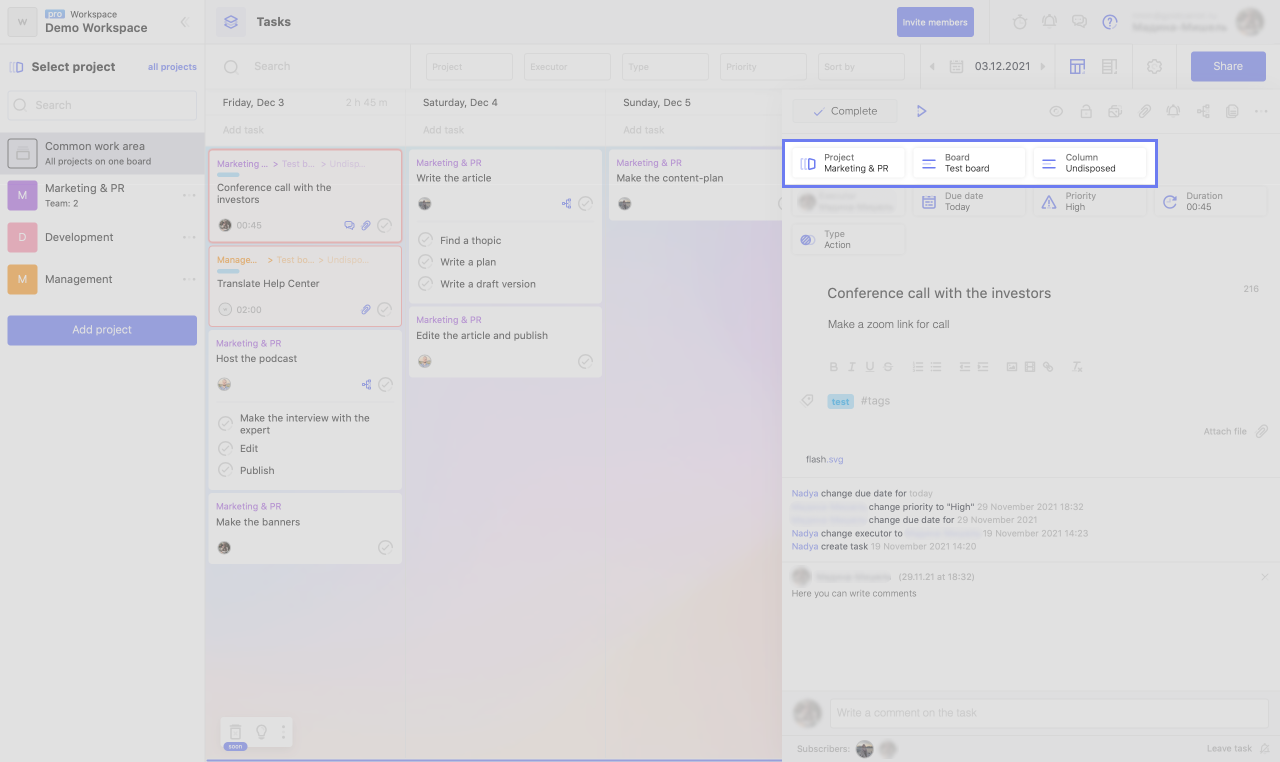
You can change the location of the task using the corresponding fields:
- Project
- Board
- Speaker
If, while working with boards, you move a task from one column to another, the value of the corresponding field will also change.
Executor
Each task must have an executor. A task without an executor brings chaos to the work, because, formally, no one is engaged in it.
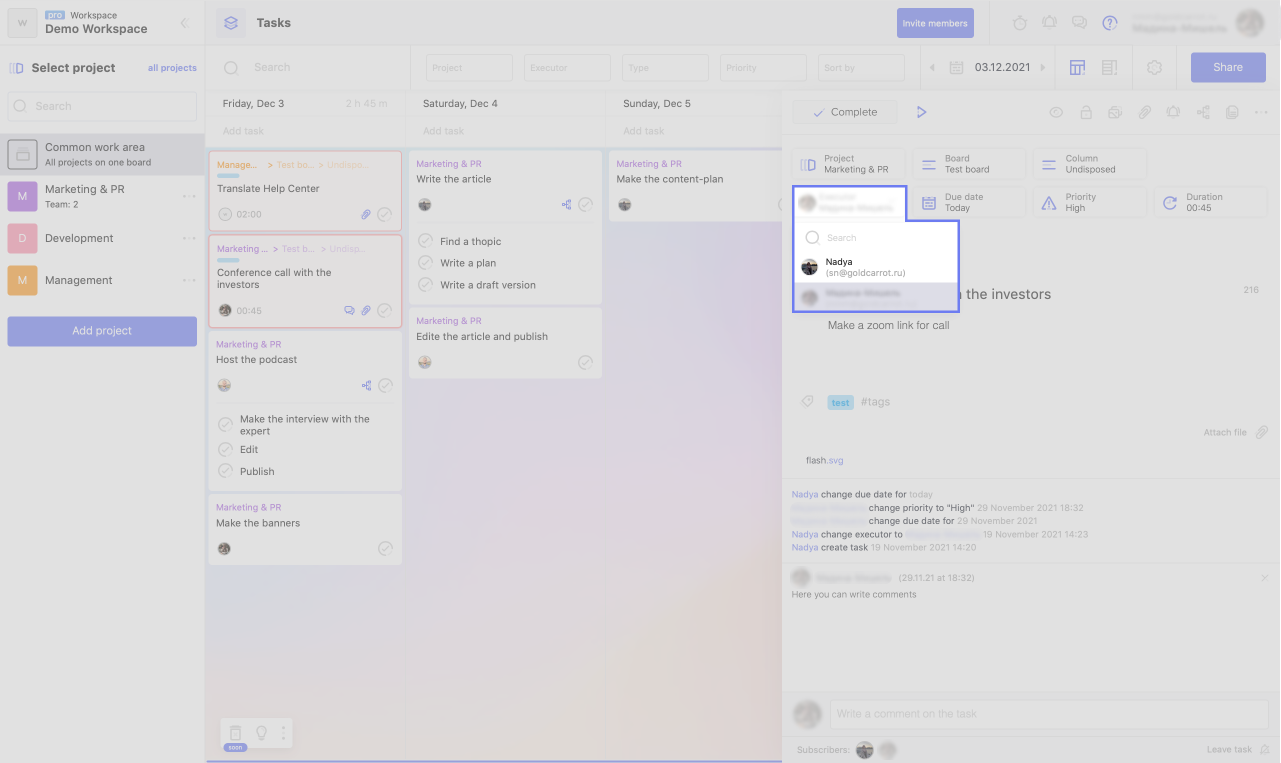
You can select the executor from the drop-down list with people who have access to the project and the board. The list can be called up in three places:
1. When creating a task by clicking on the profile icon or by using the hotkeys Ctrl + 2.
2. By clicking on the profile icon on the task card.
3. By clicking on the profile icon on the panel with detailed information on the task.
Date and duration of the task
Like a task without a executor, a task without a deadline is of no benefit. If a task has no deadline, it is not clear when to start it.
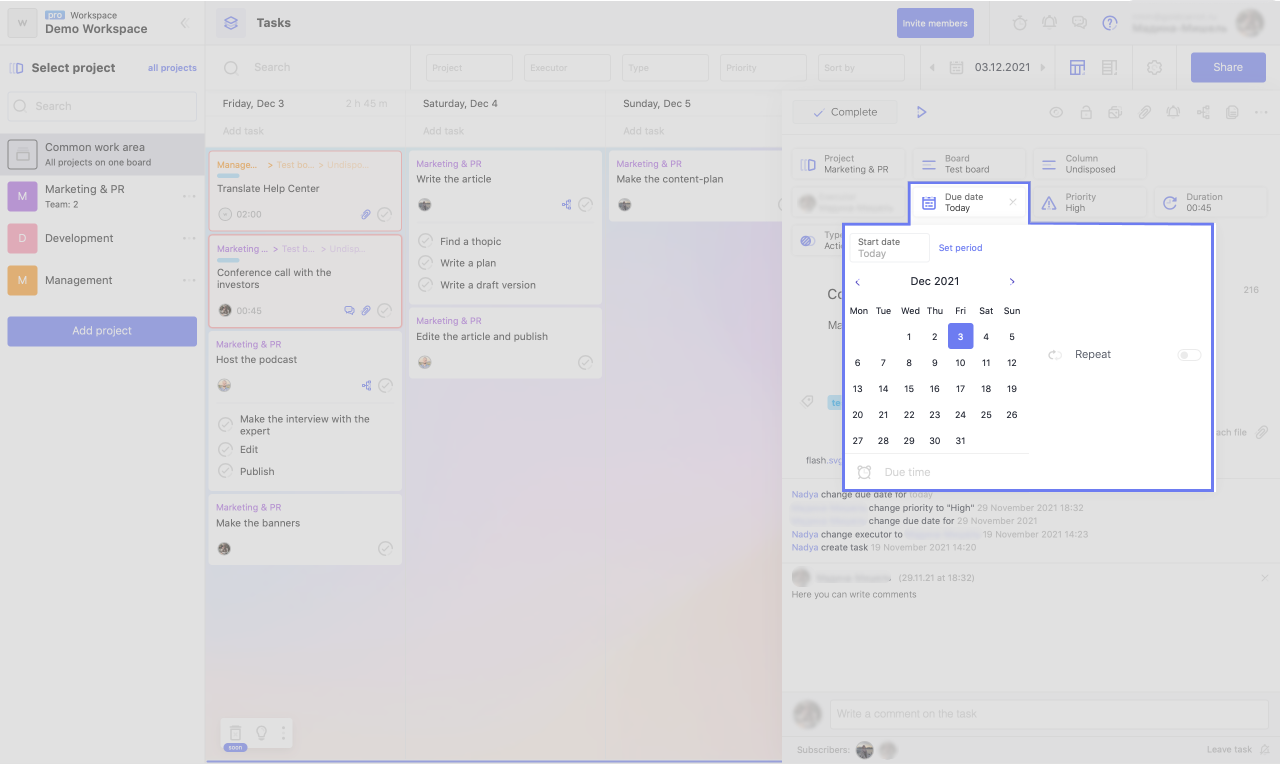
To indicate the date:
1. Click on the calendar icon on the task card or on the panel with detailed information on it.
2. Select a date on the mini-calendar.
By default, this will be the start date for the task.
Advice
НOn the mini-calendar, you can indicate the exact time by which you need to submit the task.
If you work in calendar mode, when you move a task from one column to another (from date to date), the task's deadline will also change.
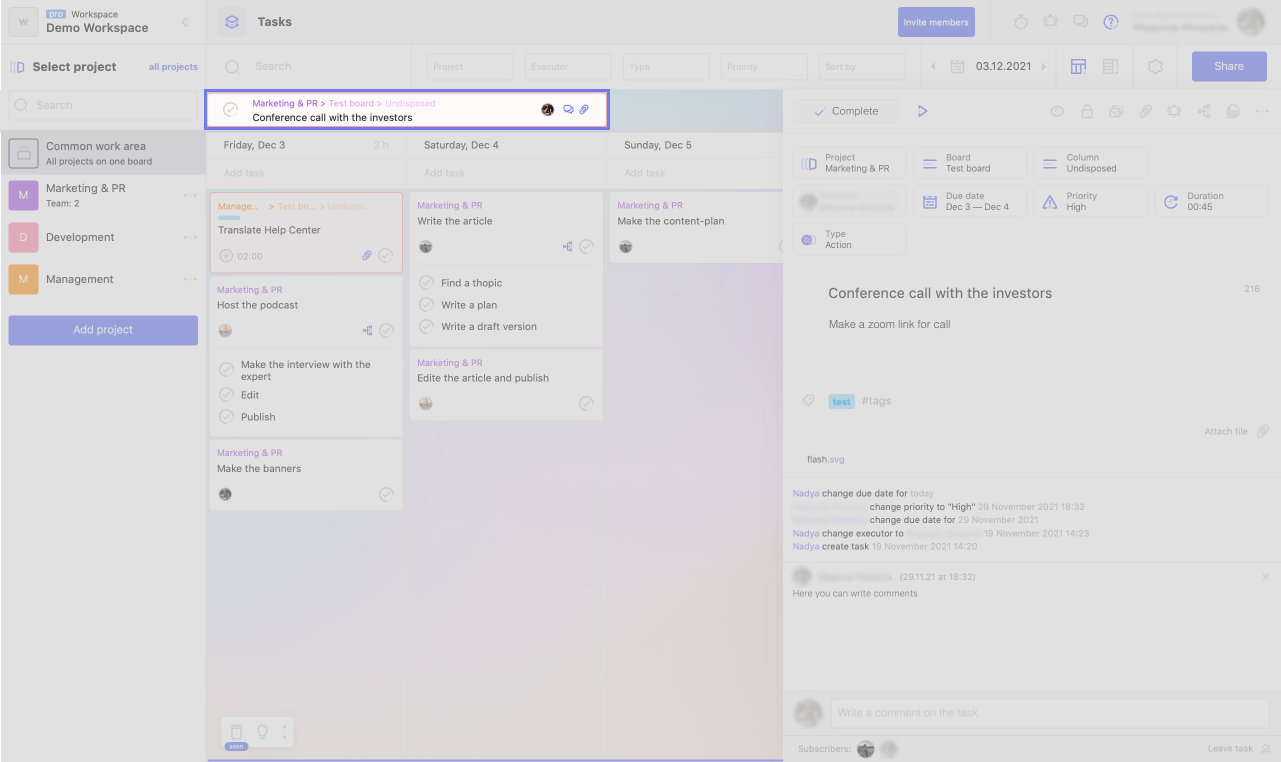
Also, if your workspace has a Pro-subscription, you can indicate the end date of work on the task. This will turn an ordinary task into a "long" one, and it will move to a special timeline above the columns of the calendar:
Recurring tasks
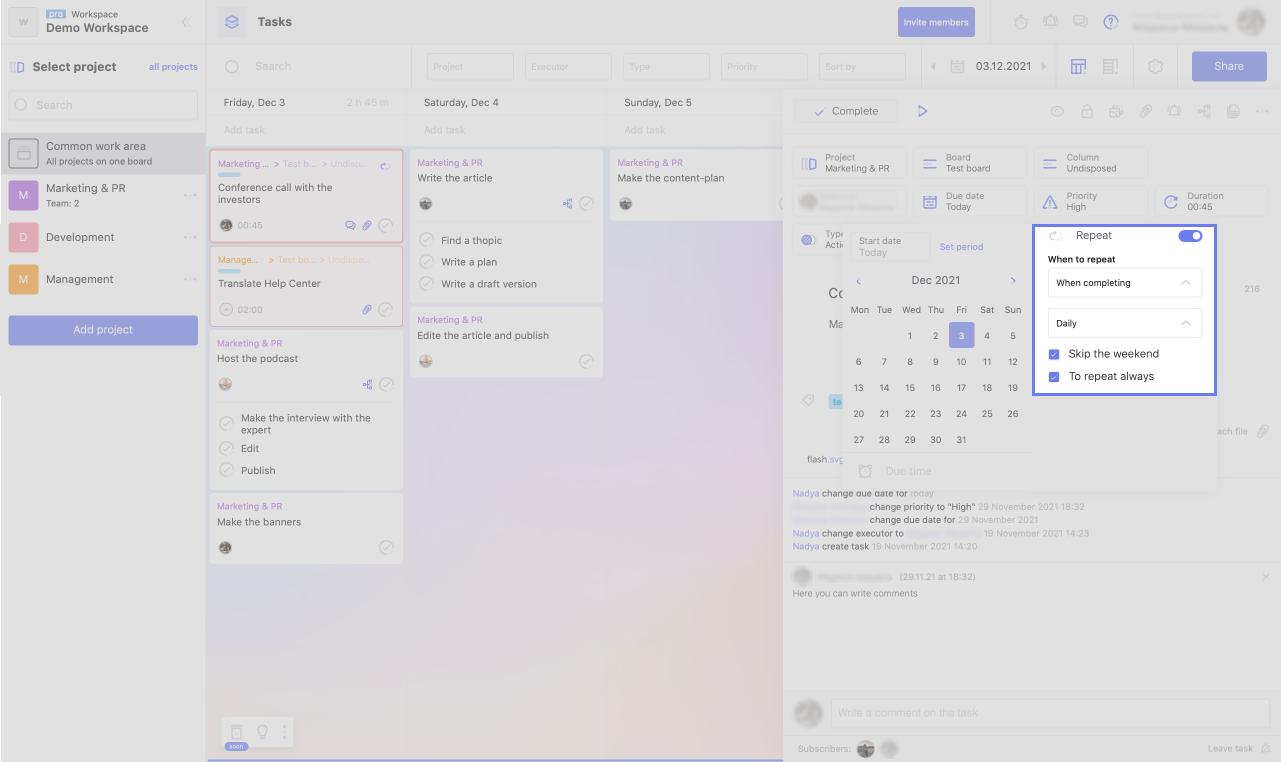
Here you can make the task repetitive. For this:
1. Turn off the "Repeat" toggle switch;
2. Indicate the conditions of repetition (in which case and on what days it is necessary to repeat).
All settings will be saved automatically, and the task will start repeating.
A priority
When there are a lot of tasks, you can easily get lost, because it is not clear which task to do first. In this case, the WEEEK has a priority system.
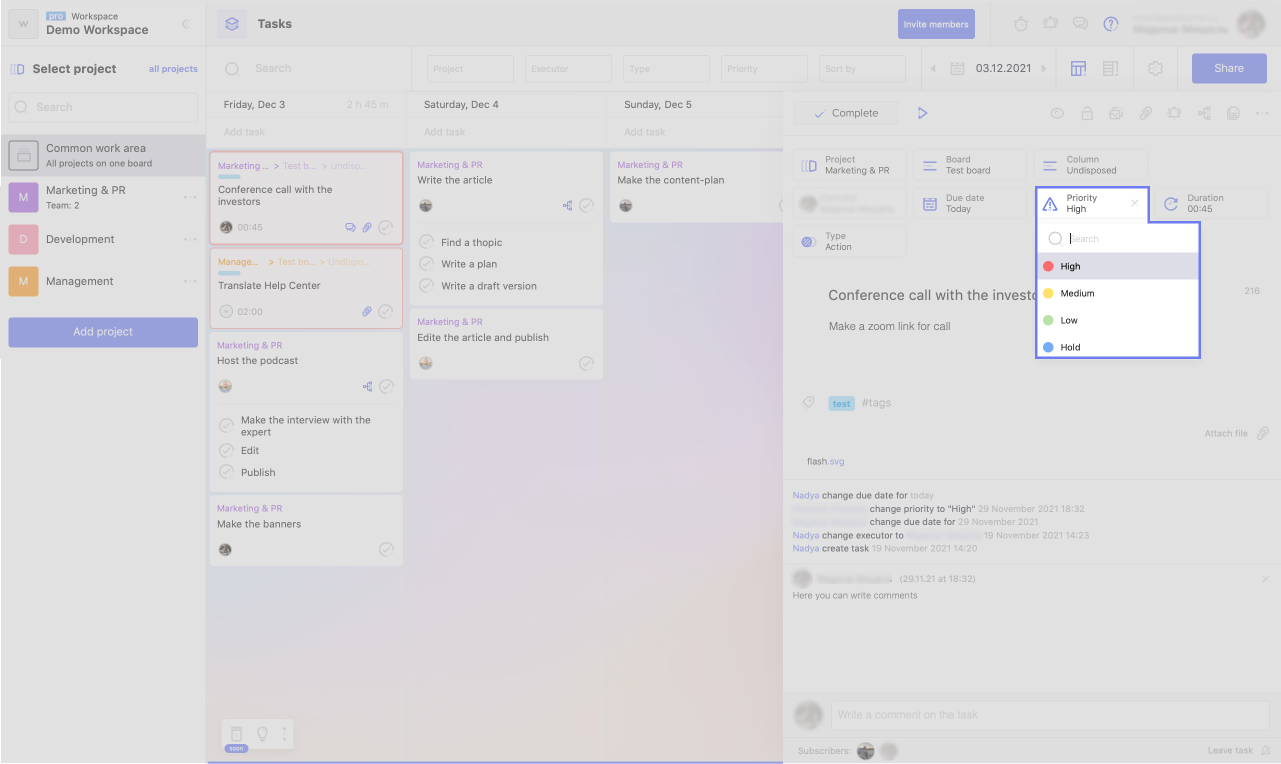
To prioritize a task:
1. Open the panel with detailed information on the task.
2. Click on "Priority".
3. Select a priority from the drop-down list.
There are four priorities in total:
- High.
- Average.
- Short.
-
Frozen.
If a task has a priority, it is displayed on the card as a "highlight" next to the task card.
Task type
When creating a task, you can choose its type:
- action,
- a meeting,
-
call.
WEEEK displays each type of task differently and notifies it differently.
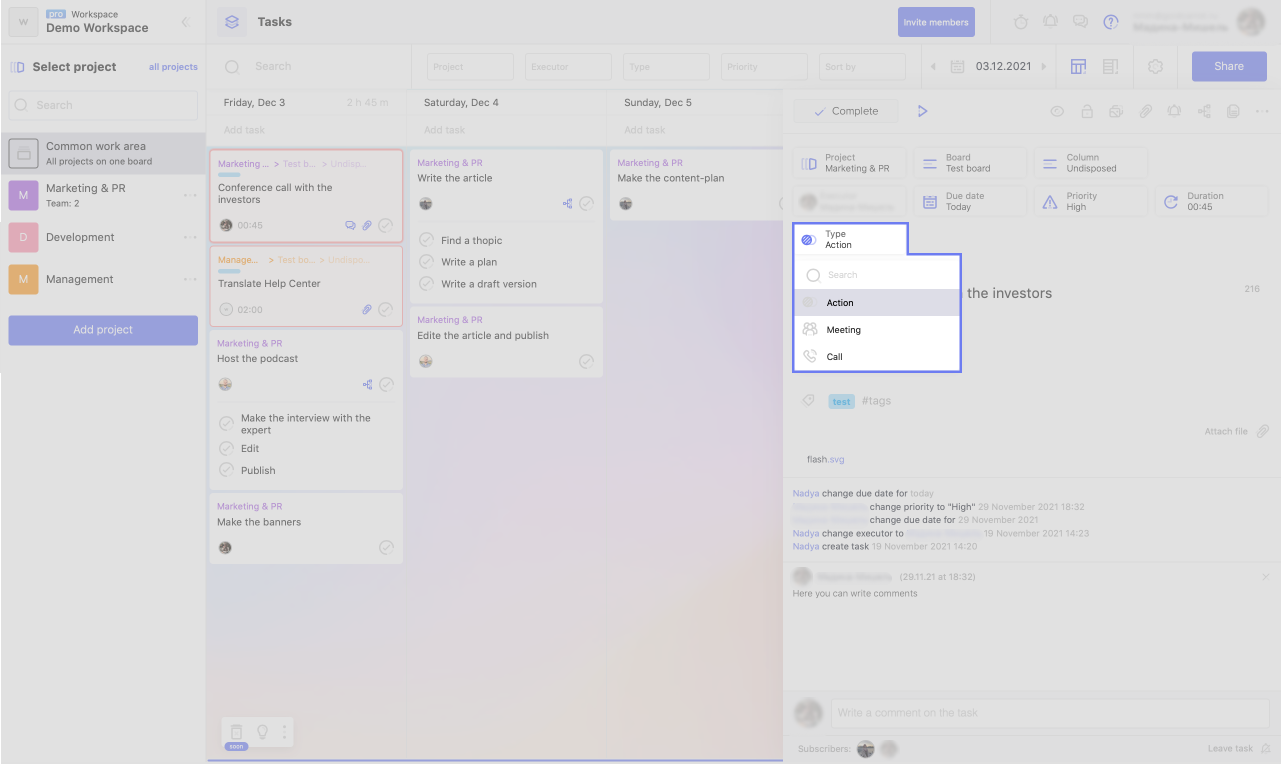
You can select the type of task:
1. At the stage of creating a task, by clicking on the icon of the task type, or by using the keyboard shortcut Ctrl + 1.
2. On the panel with detailed information on the task, by clicking on the "Type" button.
The issue type is always displayed on the issue card.
Description of the task
If the title of the task is not enough and you need more details, you can add a description.
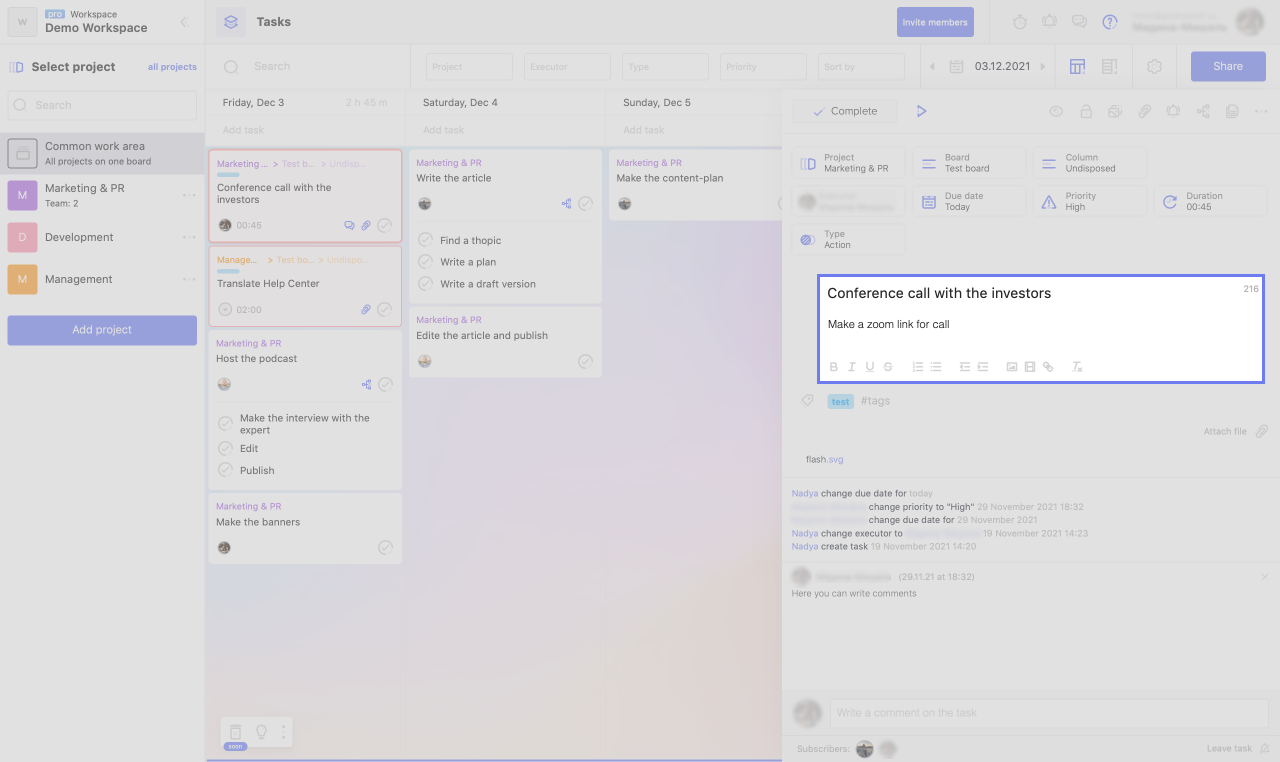
The task description editor supports text formatting:
- bold, italic, underline and strikethrough style;
- ordered and unordered lists;
- increasing and decreasing indentation;
- adding images, videos and links (if the link is directly inserted into the description, it will be recognized automatically).
There may be some information we haven't added yet. But you can ask us here:

