Access to a project
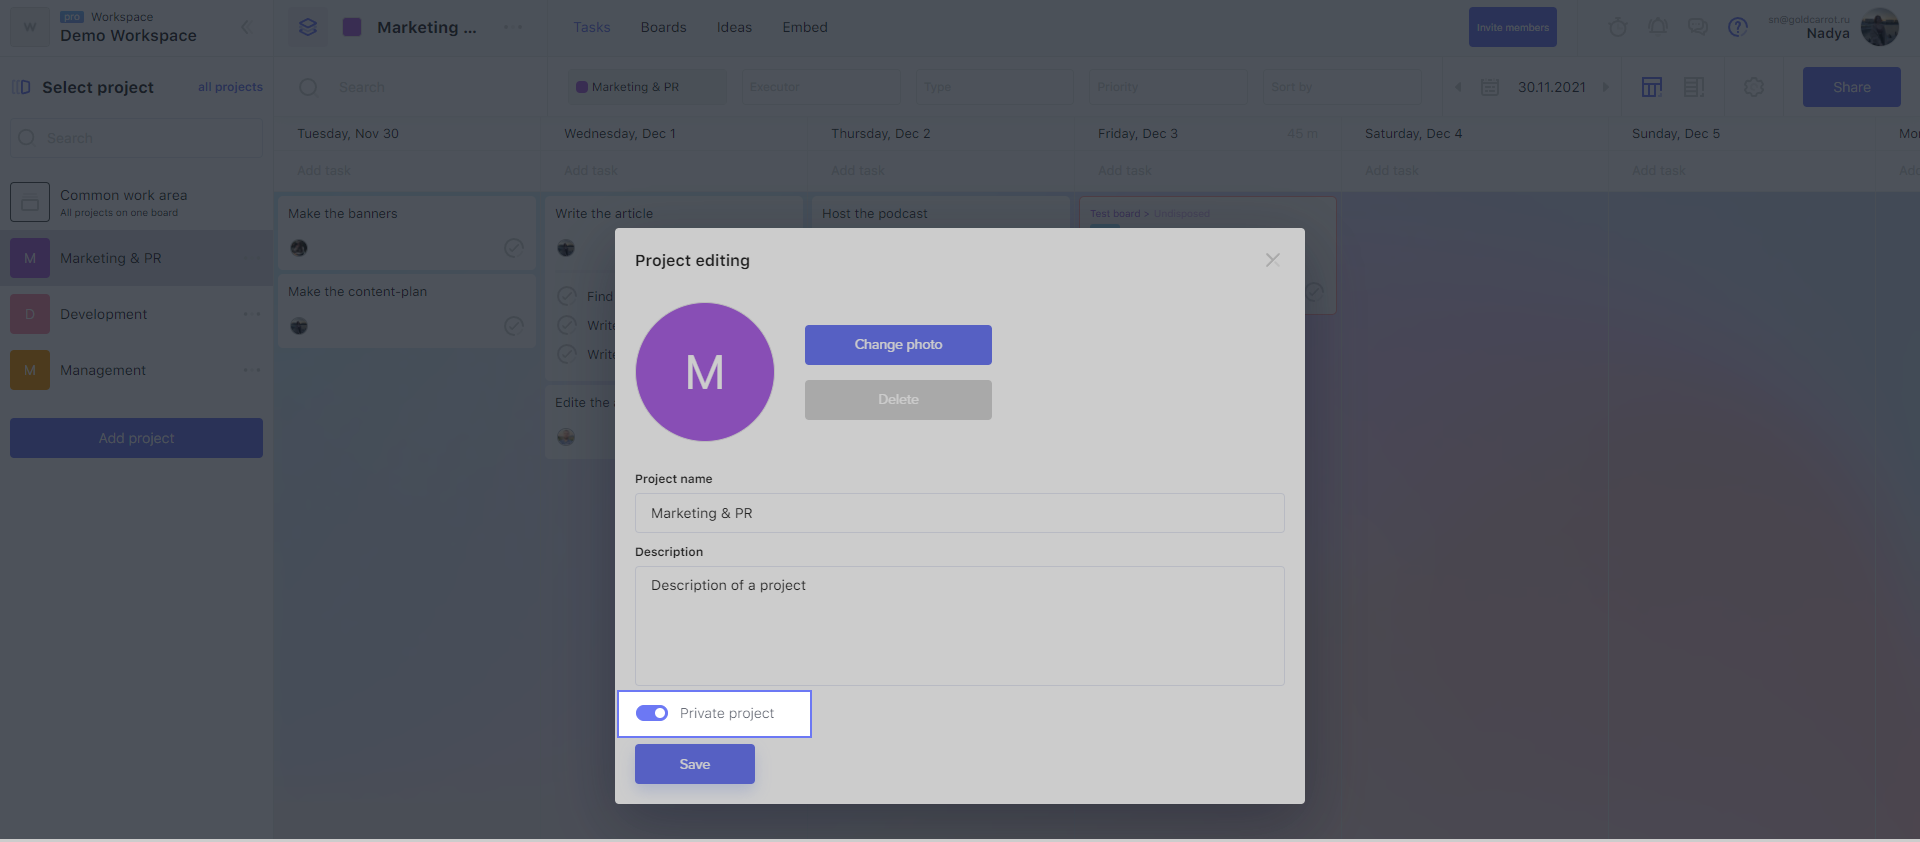
By default, all users of the workspace have access to all projects inside it. If you want to restrict access to the project — to give it only to certain team members — you need to make it private. For this:
1. Open the project menu by clicking on the three dots next to its name.
2. Go to "Settings".
3. Turn on the "Private" switch.

You can restrict access to the project only if you have a Pro-subscription.
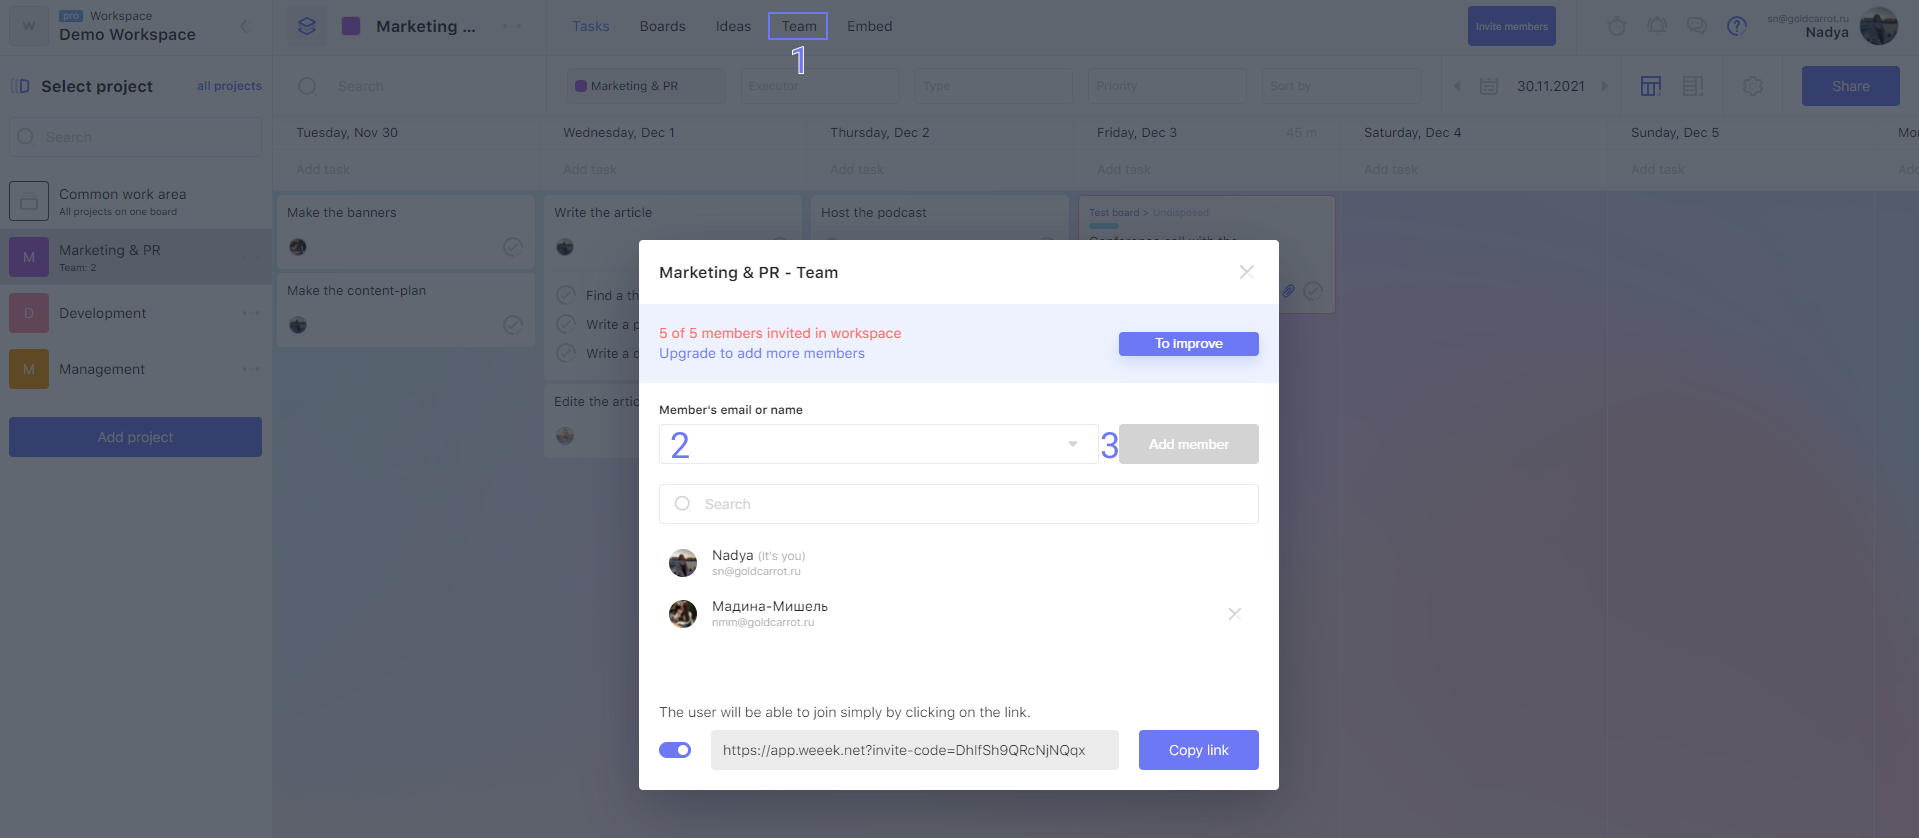
Now the "Team" item will appear in the top menu of the project.
Adding people to a project

To add team members to a project:
- 1. Select the "Team" item in the top menu of a project;
- 2. In the window that opens, specify the email or the name of the person which you want to add to the team (or just put the cursor in the field and select the person from the list).
- 3. Click the "Add member" button when it becomes active (changes color).
As a result, the person should appear at the bottom — in the list of users with access to the project.

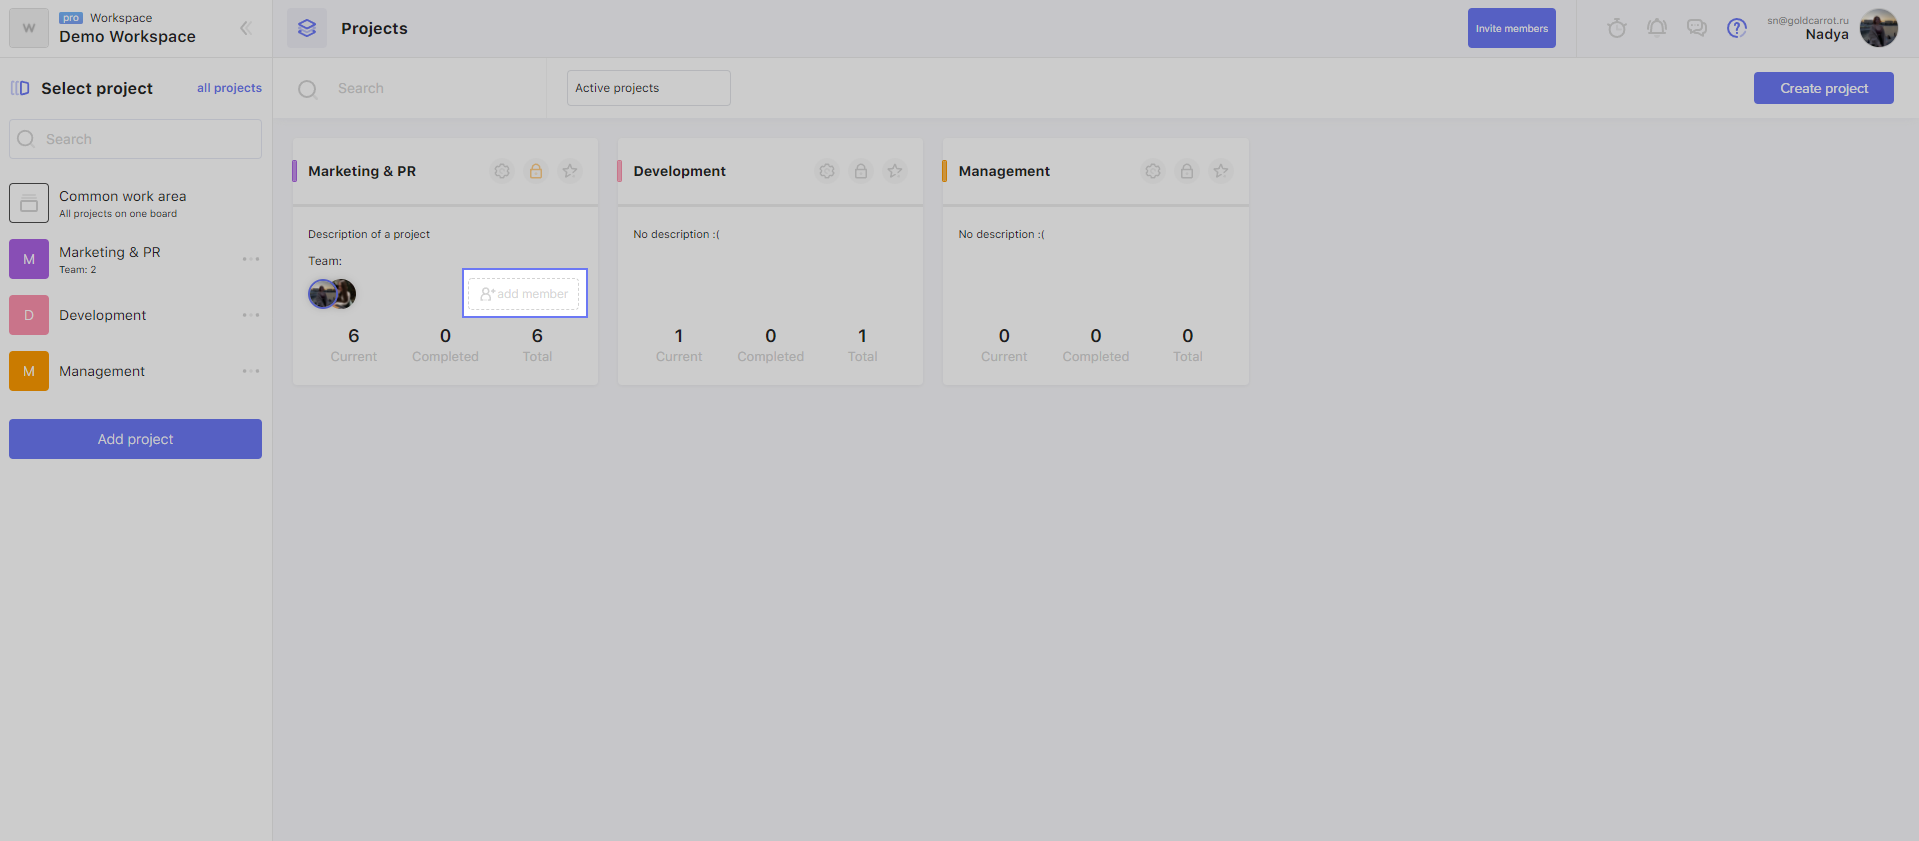
You can also open the project team window from the "All projects" page by clicking on the "Add member" button in the project card.
Removing people from a project

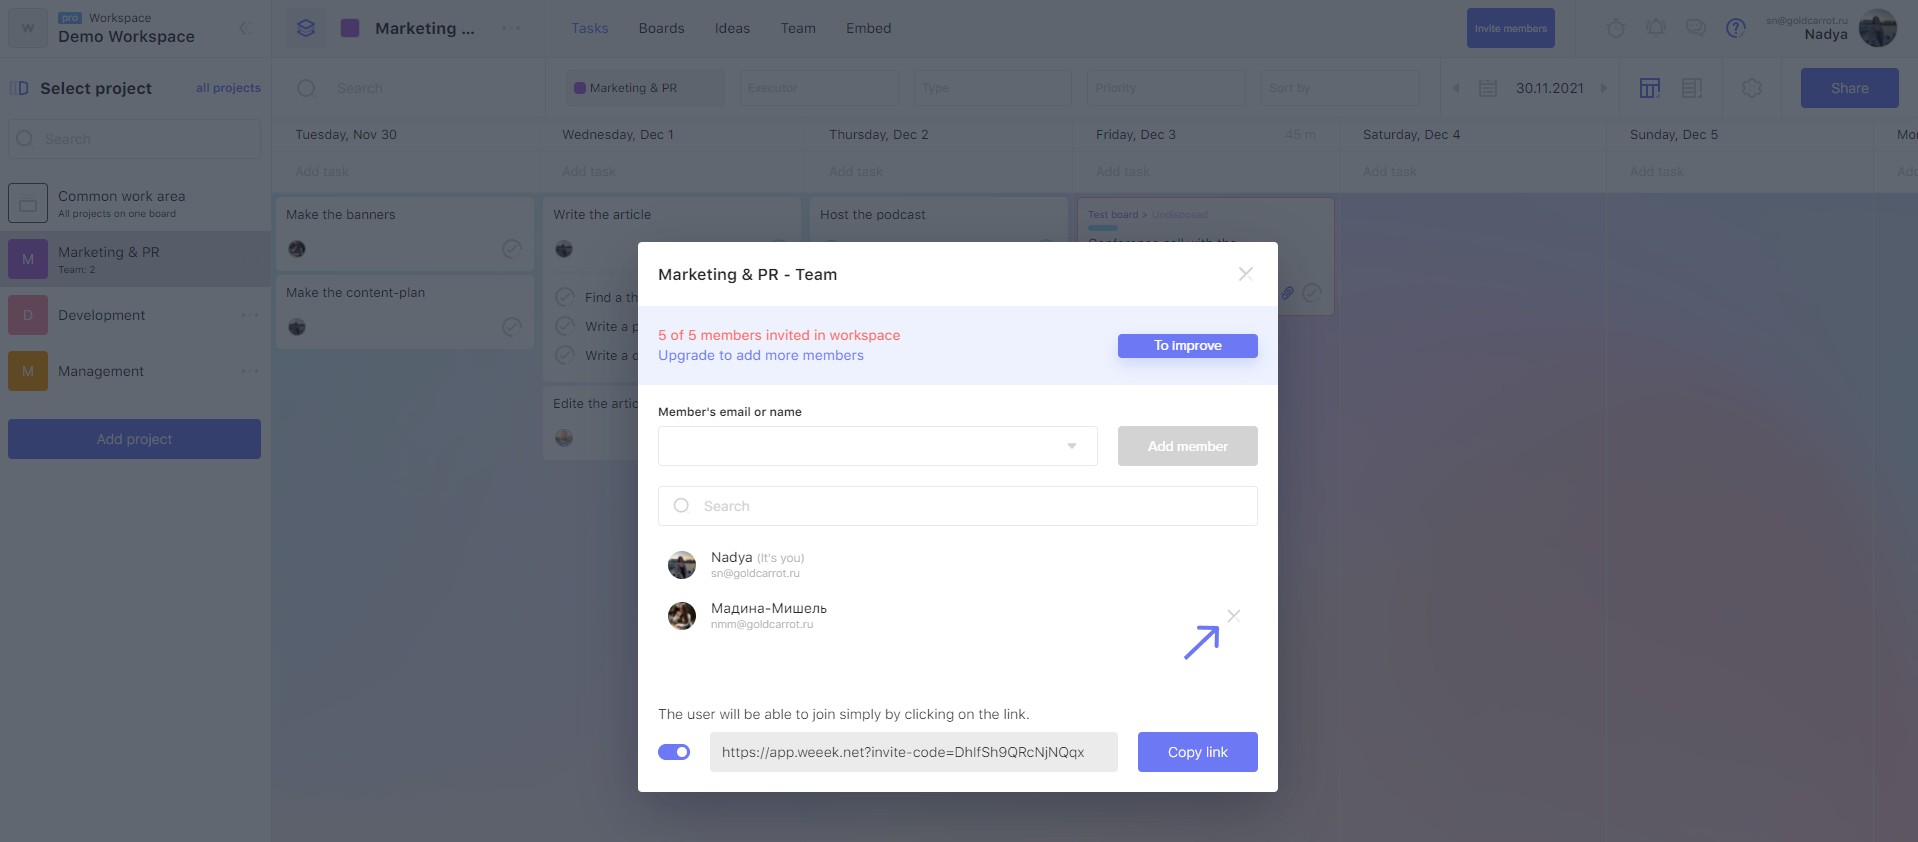
To withdraw access to a project from a certain team member, just click on the cross next to his name.
There may be some information we haven't added yet. But you can ask us here:

