Board Mode
WEEEK virtual whiteboards help you to work with tasks like with sticky notes on real whiteboards (magnetic or cork) - by moving them between columns. Each column represents a specific stage in the workflow. The simplest set of columns:
- Inbox
- In work
- Completed
Boards are a great way to visualize. They allow you to see all tasks in one place and make your work more visual.
Adding board
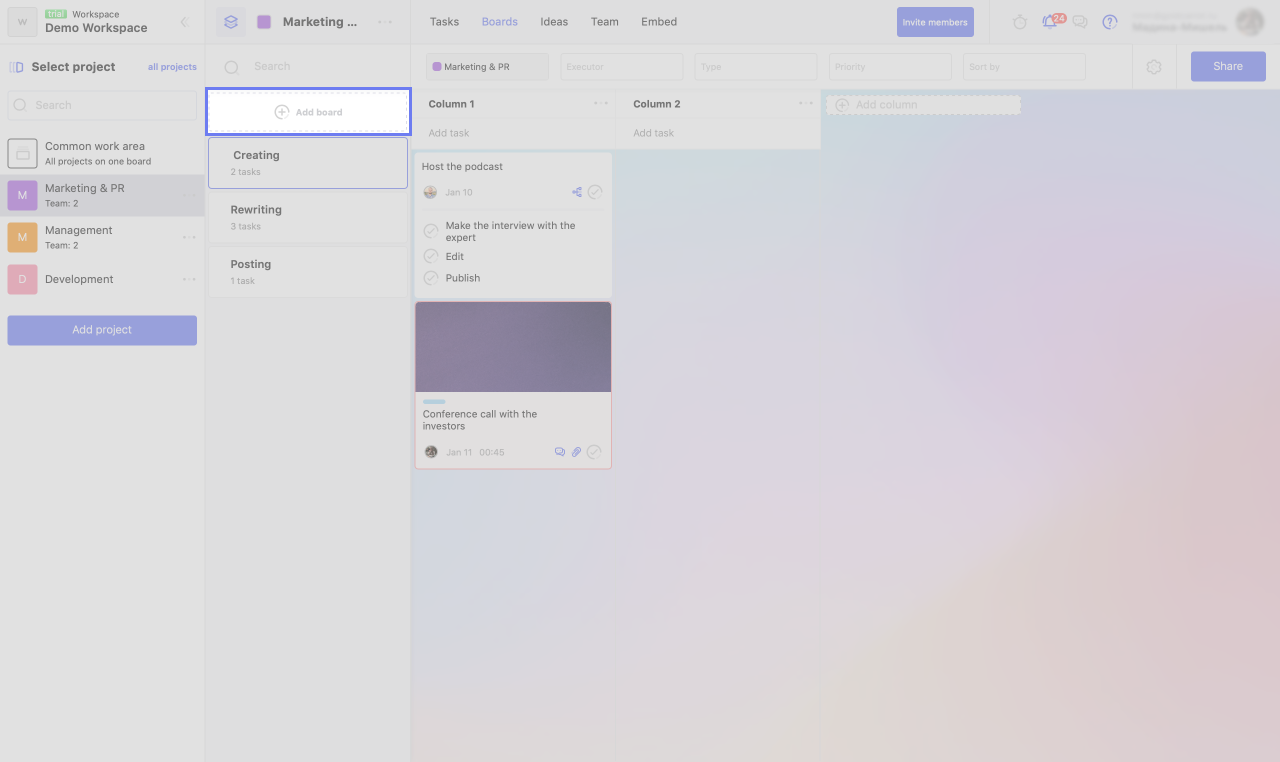
To create a new board in the project, click the "Add board" button.
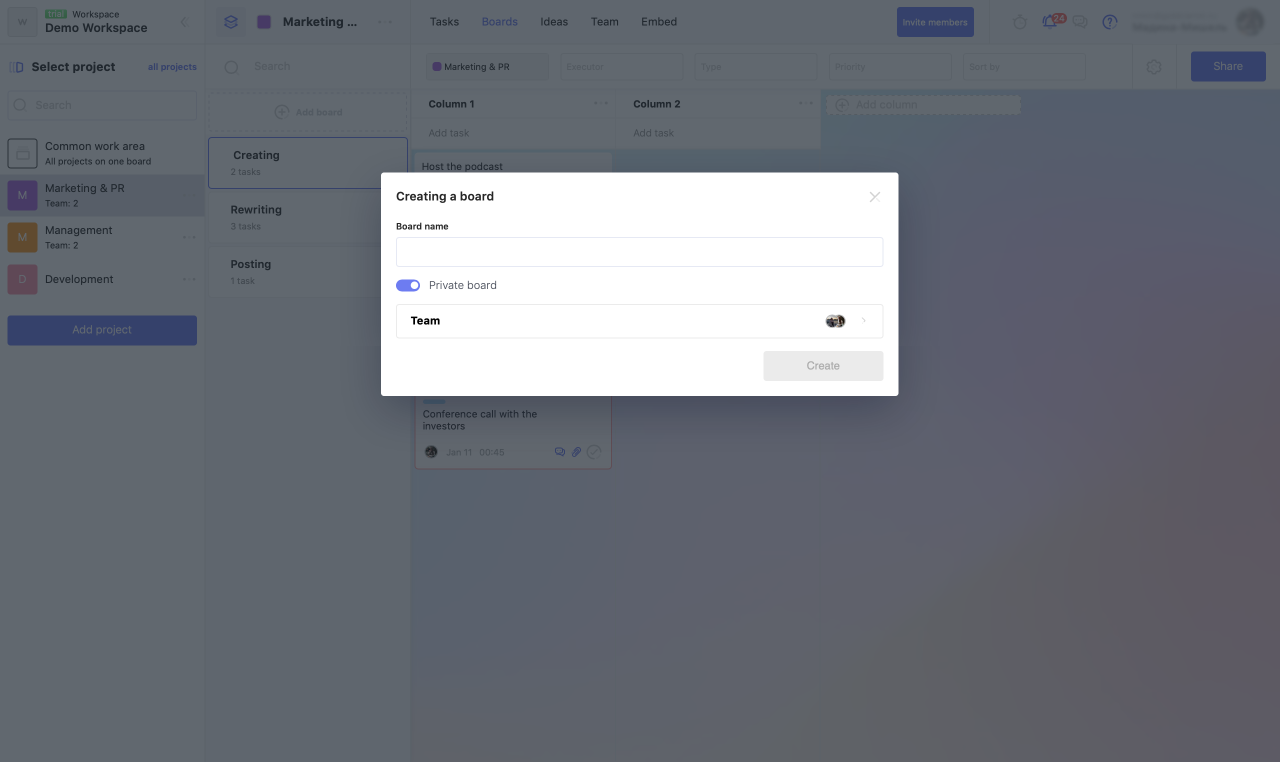
In the window that opens, you can:
- name the board
- make it private and add the necessary team members (for this, the workspace must have a Pro-subscription).
The name and privacy of the board can be further changed through the settings.
Board actions
The boards you created you can:
- tune,
- delete,
- move in the board list.
In addition, you can share the whiteboard in browse mode with users who are not in WEEEK.
Setting up the board
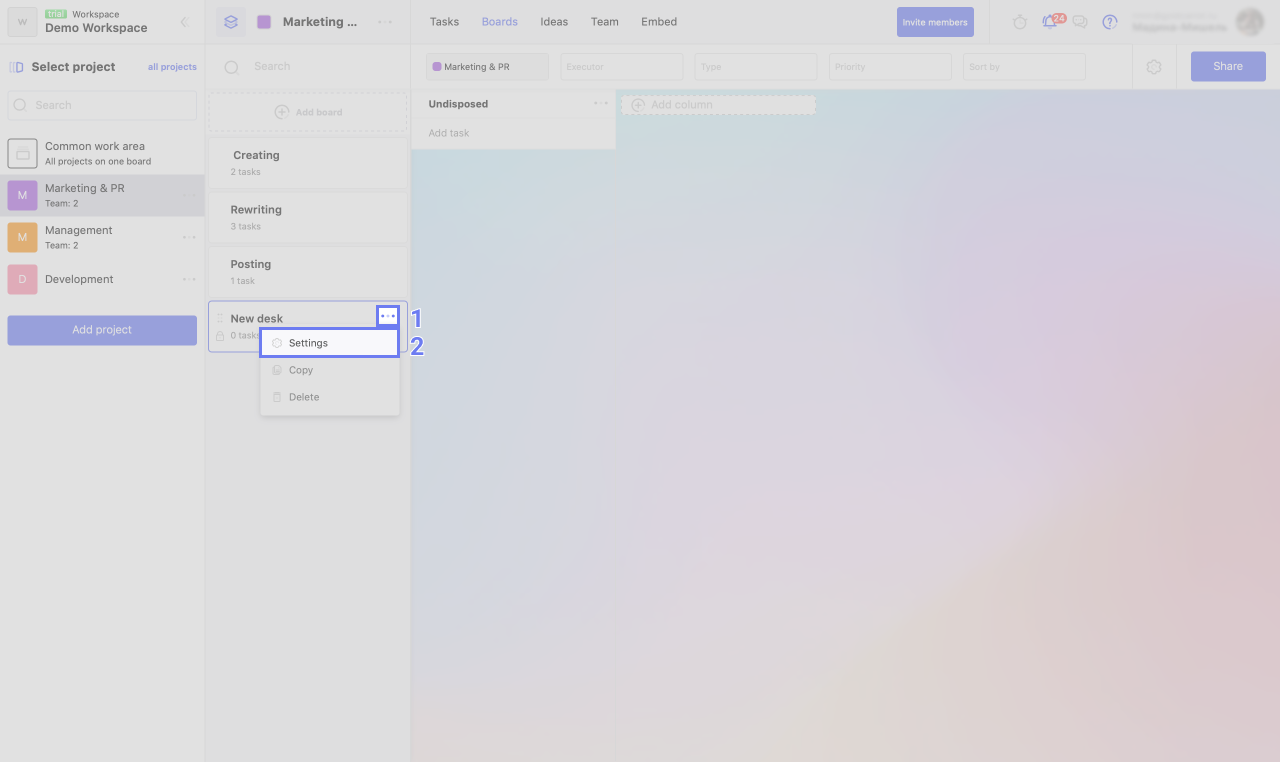
If you want to change the name of the board, make it private or, conversely, public, go to the settings. For this:
1. Click on the three dots next to the board name.
2. Select the "Settings" item.
Copying a board
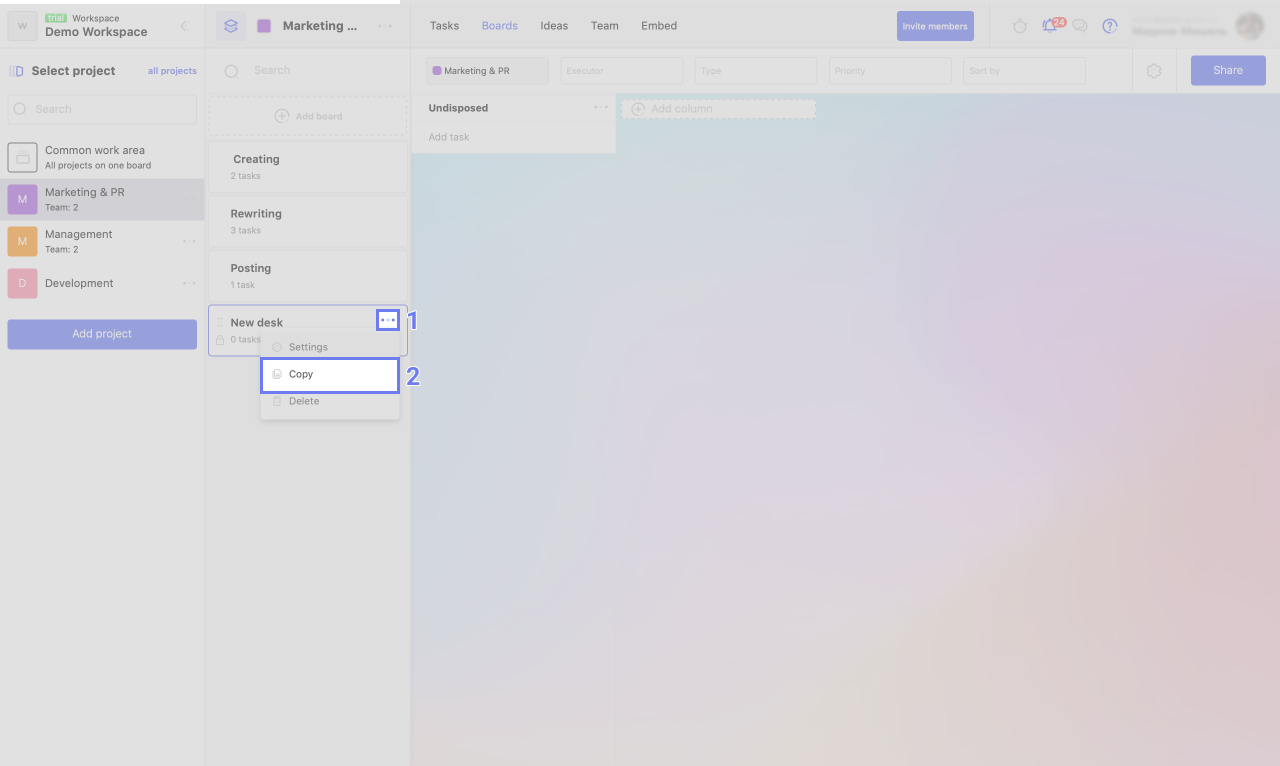
If you want to duplicate a board with all its contents, create a copy of it via the board menu:
1. Click on the three dots next to the board name.
2. Select the "Copy" item.
Delete a board
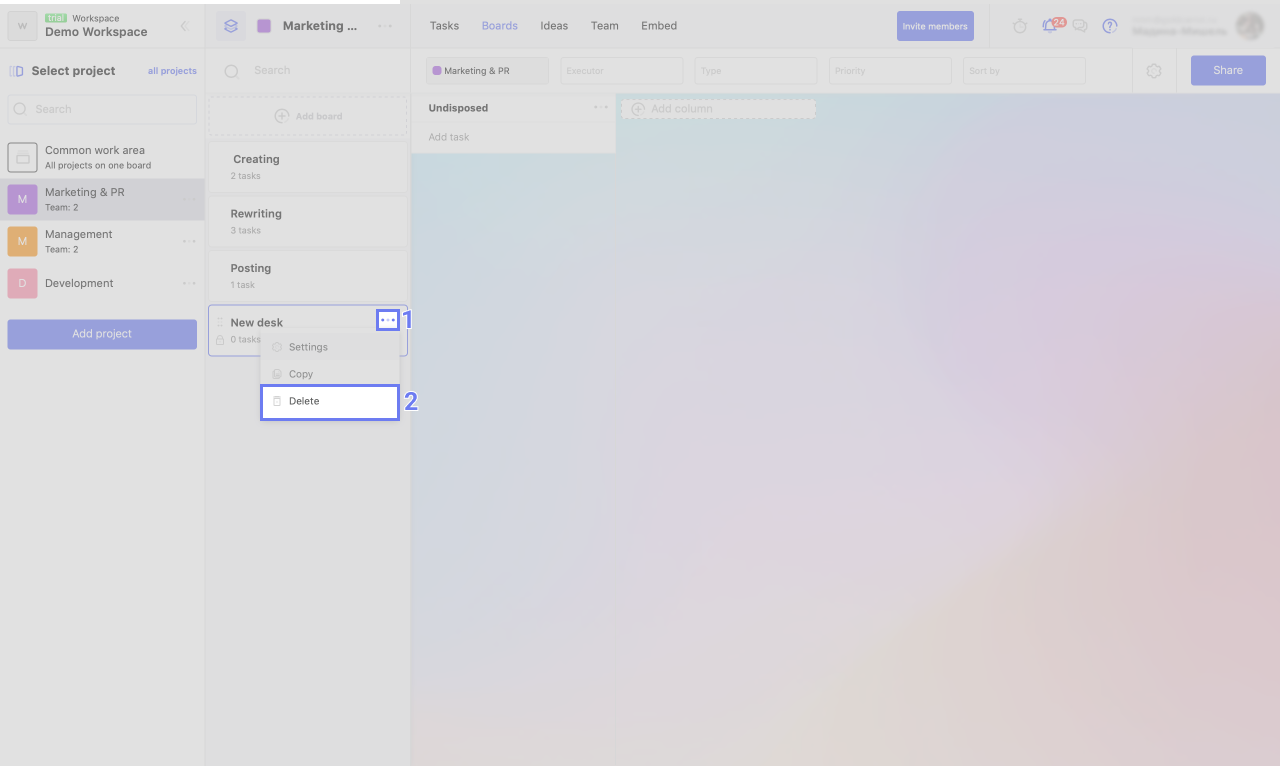
Delete the board with all its contents:
1. Click on the three dots next to the board name.
2. Select the "Delete" item.
Access to the board
In WEEEK, you can restrict access not only to workspaces and projects, but also to individual boards. For example, to give access to the board, where the work with documents is in progress, only to top managers and accounting departments.
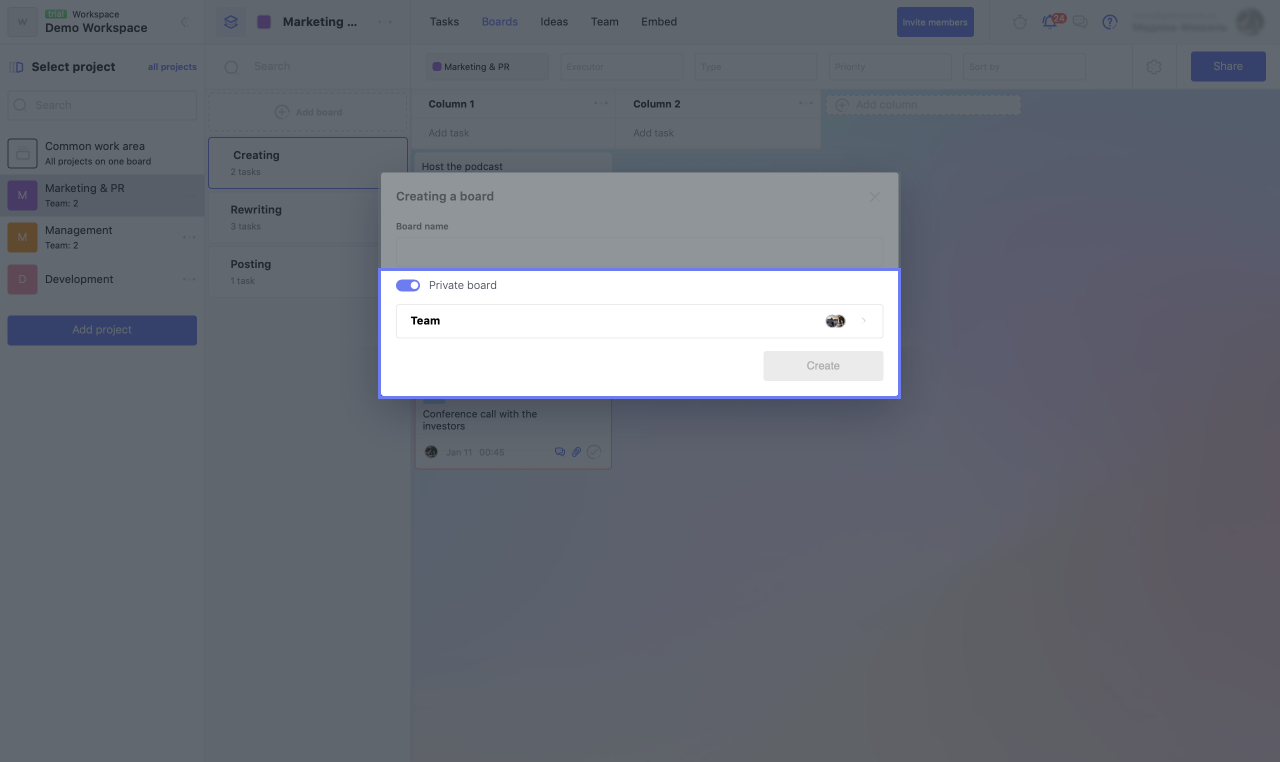
To restrict access to the board:
1. Open the board settings.
2. Turn on the "Private board" toggle switch.
After that, the "Command" tab will appear in the same window. On it you can give access to the board to certain team members.
To share a board with a team member:
1. Open the "Team" tab.
2. Enter the email or name of the person you want to add to the team (or just put the cursor in the field and select a person from the list).
3. Press the "Add person" button when it becomes active (changes color).
As a result, the person should appear at the bottom - in the list of users with access to the board.
Attention!
Access to board only have users who have:
- there is access to the workspace;
- there is access to this project if the project is private.
Setting up the board list
You can create an unlimited number of boards within the project. But when there are a lot of boards, it is difficult to navigate them. To make it easier, you can manually move the boards in the list.
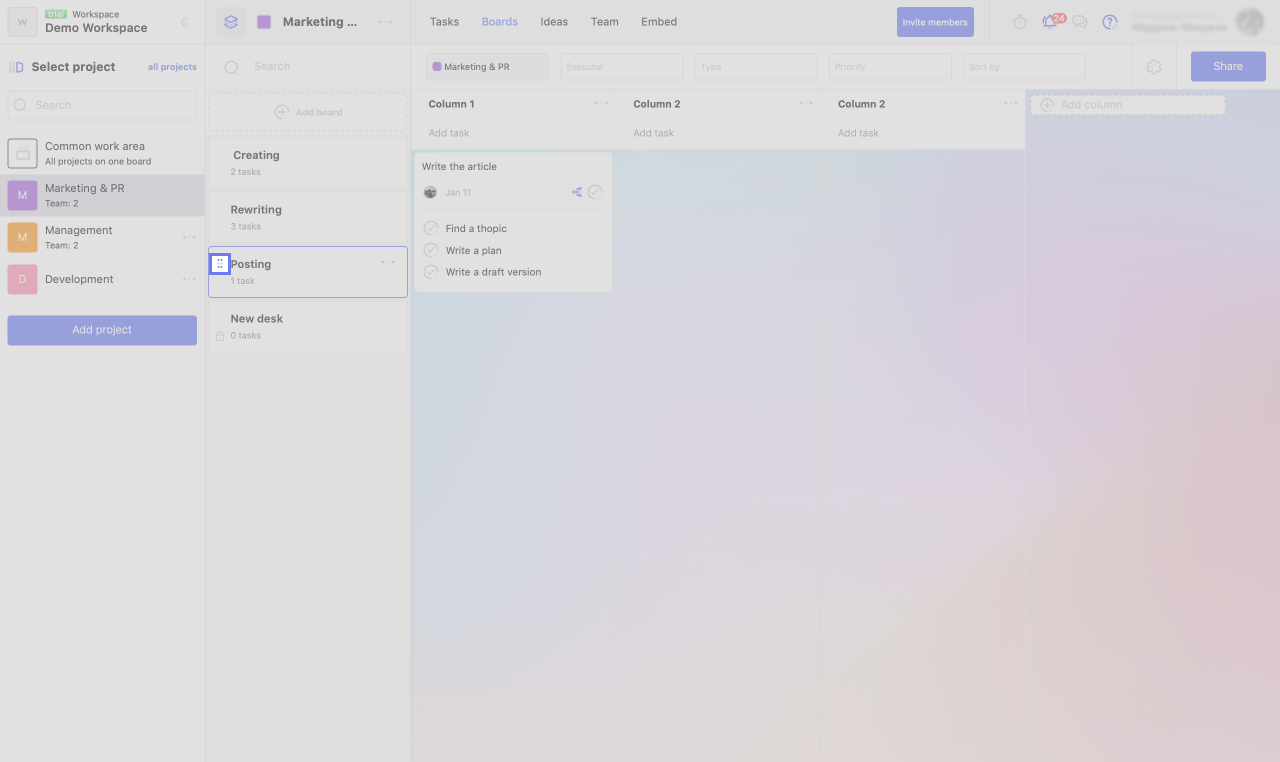
1. Hover the cursor over the board you want to move - an active zone will appear in the upper left corner of the card, indicated by six dots.
2. Grab the board card by the active zone and drag it to the desired place.
Share board
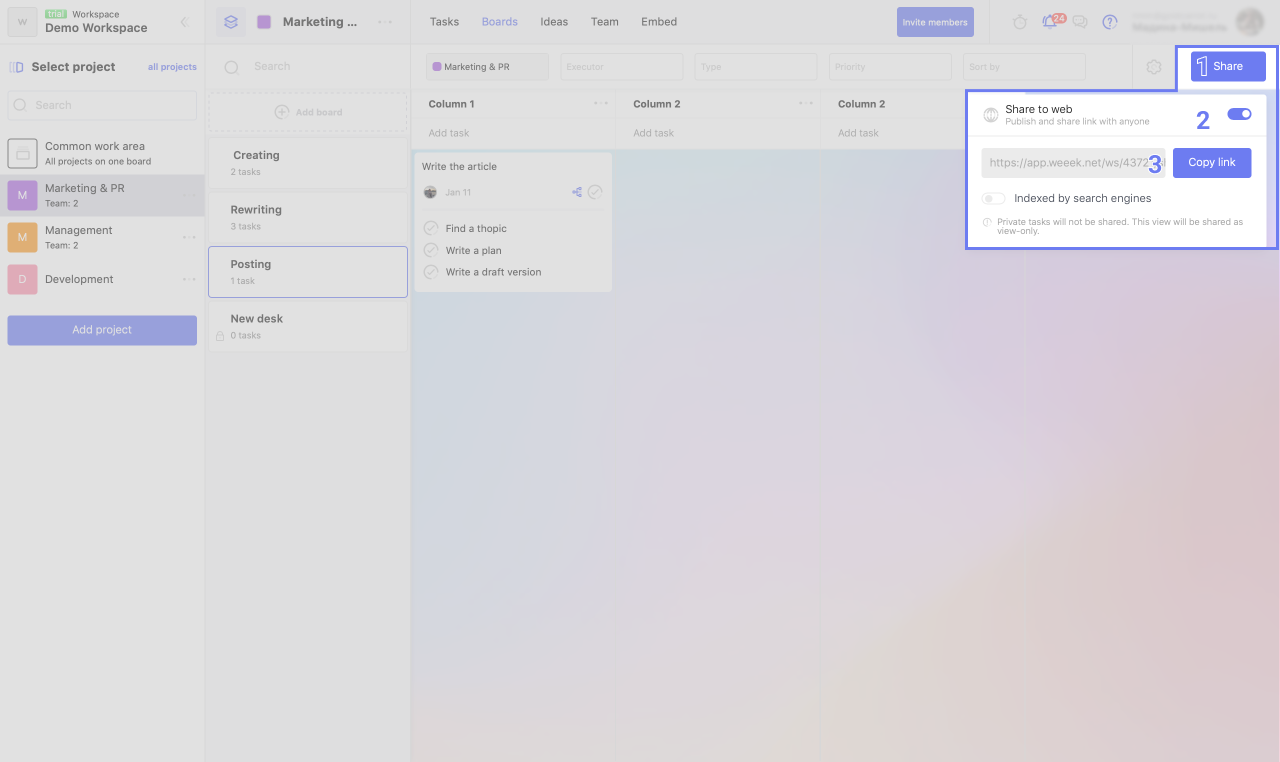
The board, including the tasks on it, can be viewed (only viewed - no one can do anything with the board, be calm) not only by users of the workspace, but also by clients and other users who are not in WEEEK. To open guest access to view the board:
1. Click the "Share" button in the upper right corner of the board.
2. Turn on the "Share" toggle switch.
3. Copy the link to view the board and send it to whoever needs it.
You can also allow search engines to index the content of the board.
Adding column
On whiteboards in WEEEK, you can describe any workflow (whether it is preparing articles for the media or producing some parts) using columns.
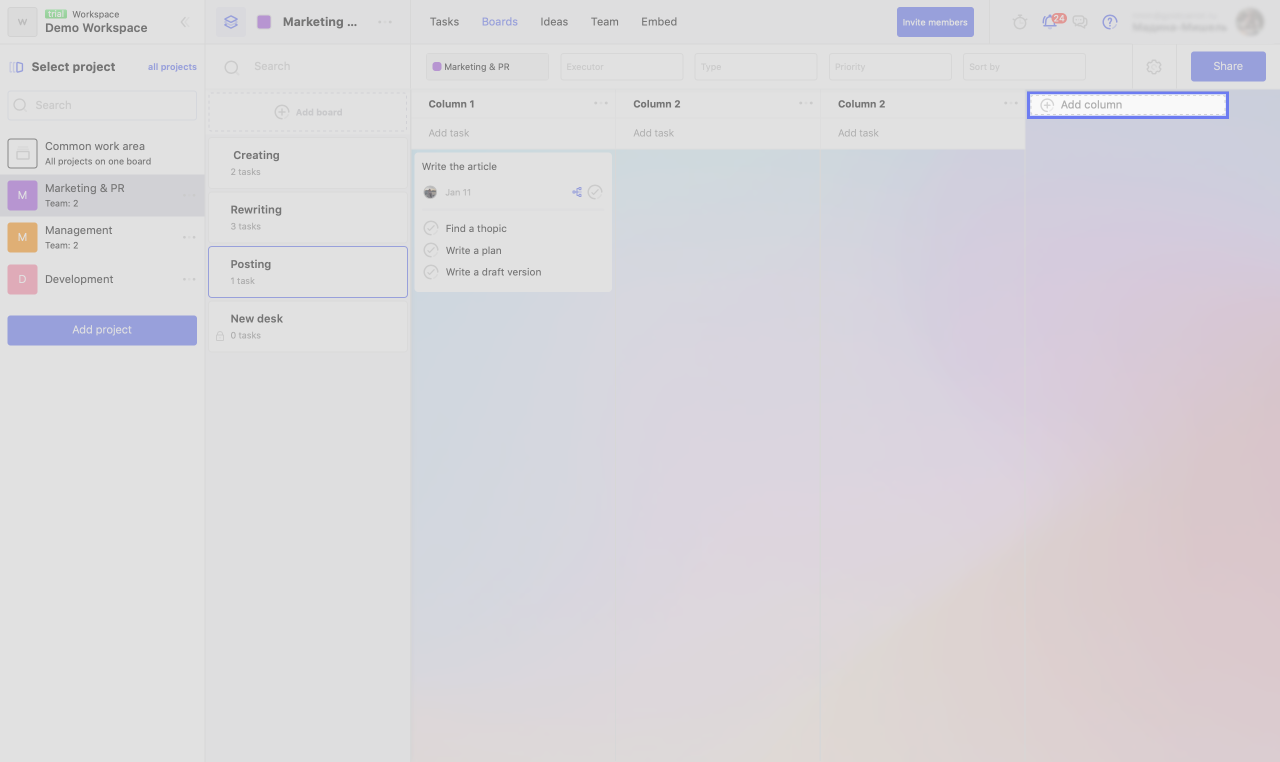
When you create a new board, there is only one column - "Unassigned" (the name can be changed). To create a new column:
1. Click "Add Column".
2. Enter a name for the column.
3. Press Enter.
Column Actions
You can move, customize and delete the created columns.
Moving columns
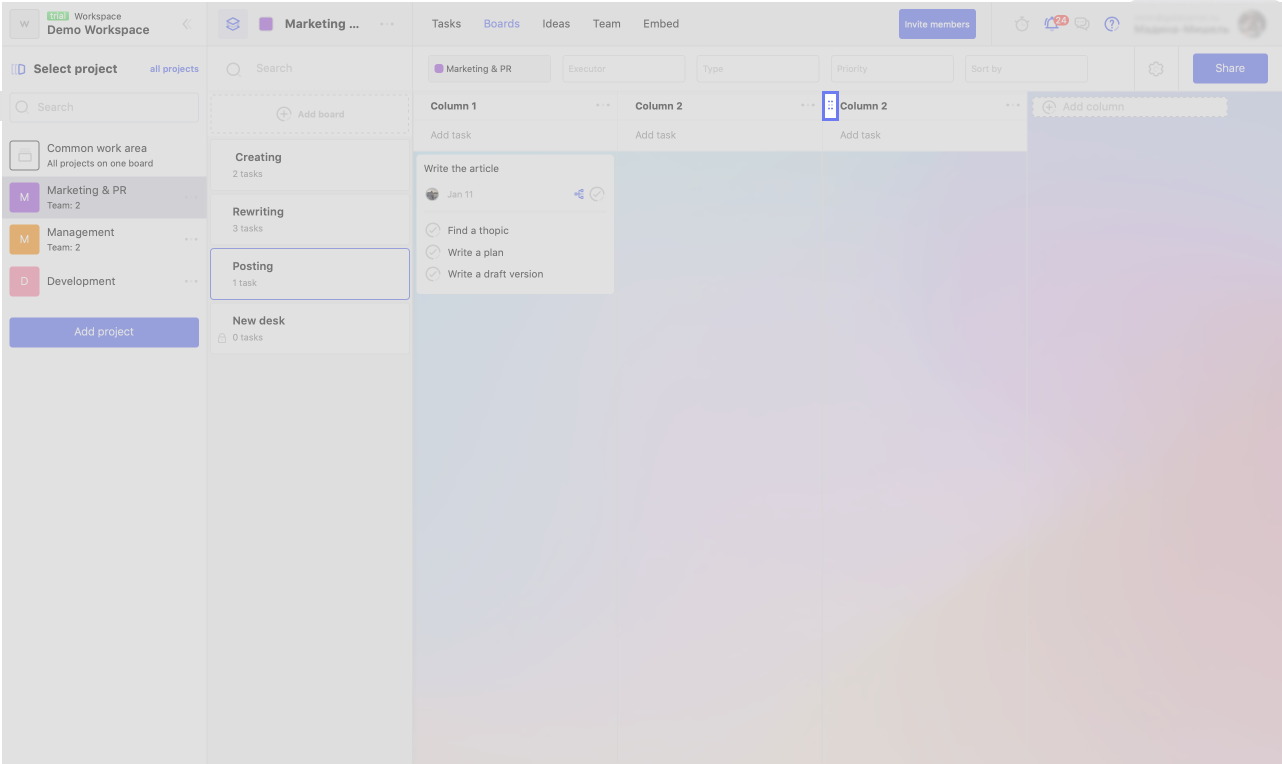
To change the order of the columns:
1. Hover the cursor over the name of the column you want to move - to the left of it an active zone will appear, indicated by six dots.
2. Grab the column by the active zone and drag it to the desired place.
Speaker setup
You can change the names of the created columns and customize the automation scripts.
Column name change
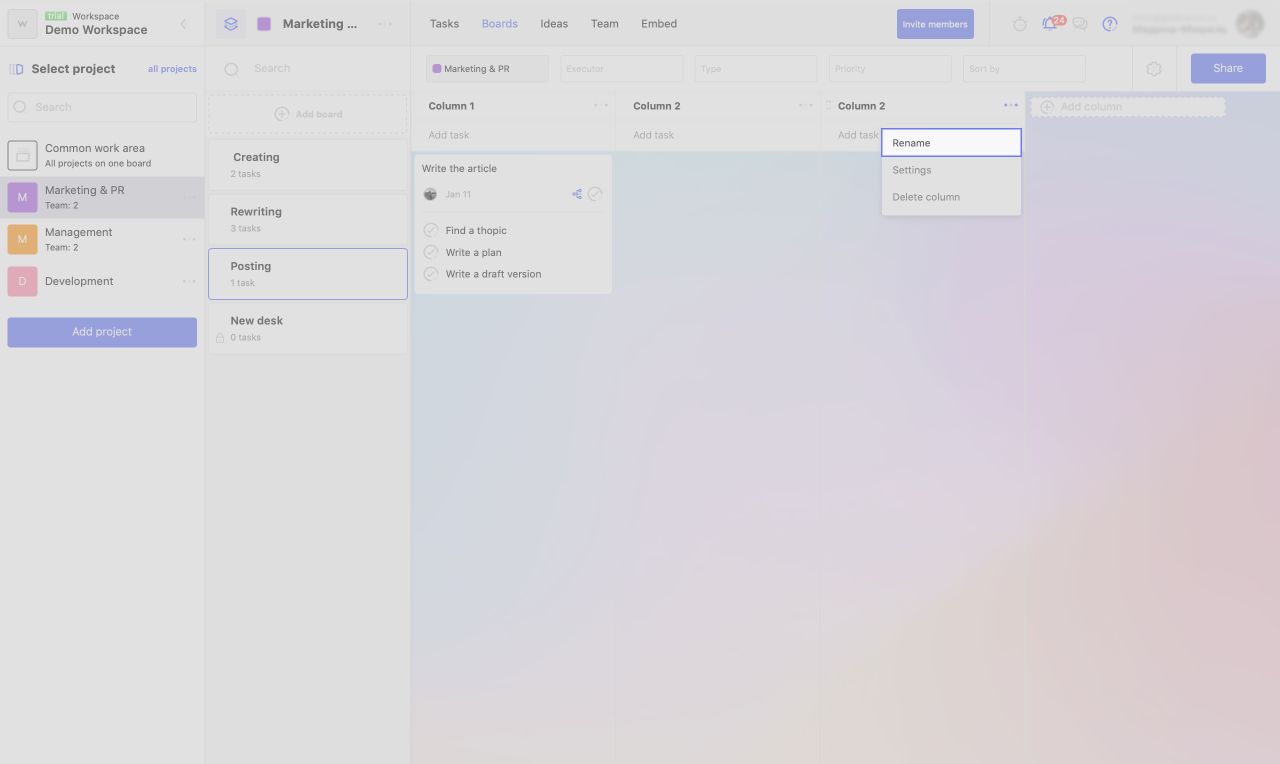
To rename a column, just place the cursor in the field with the name or:
1. Click on the three dots next to the name.
2. Select "Rename".
Column automation
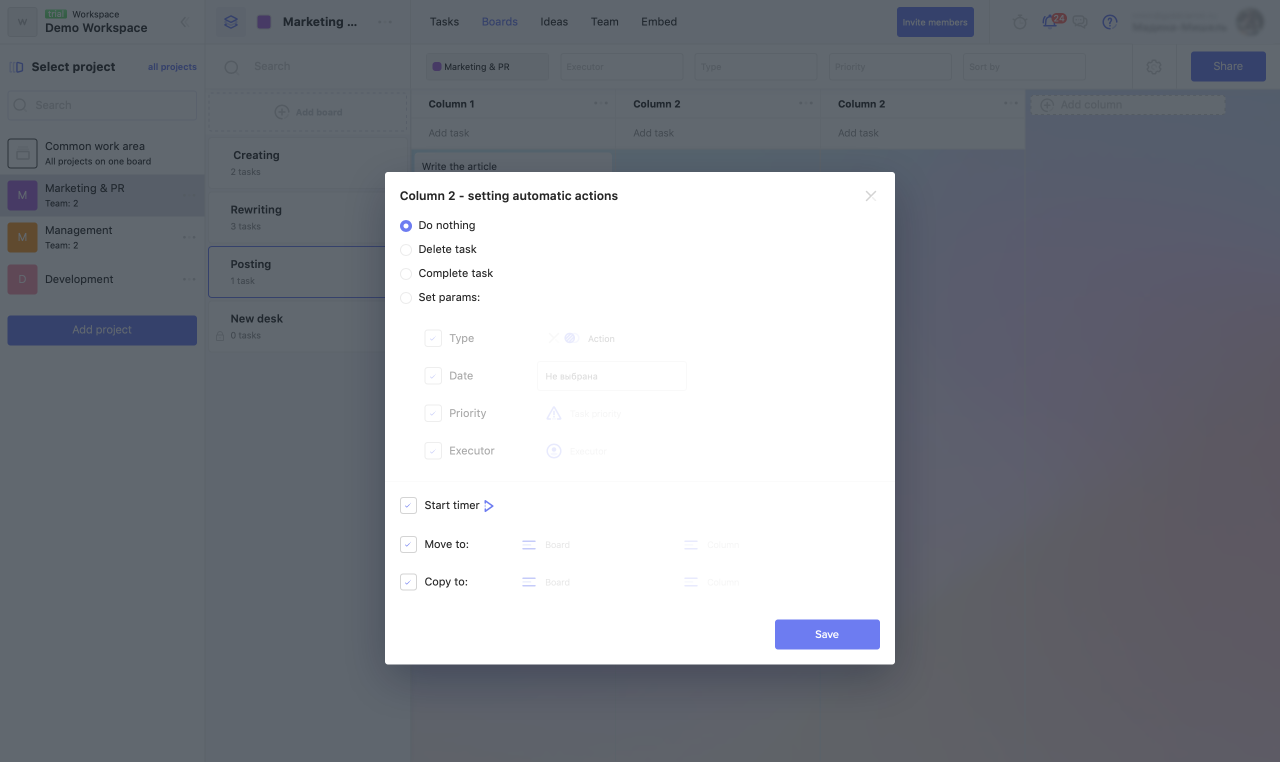
In WEEEK, columns on whiteboards can be written with automation scripts - you can choose actions that will be performed on a task when it appears in this column. This helps to cut down on the amount of routine.
To open the automatic actions configuration window:
1. Click on the three dots next to the name.
2. Select "Settings".
In the window that opens, you can select and configure the following actions that will be performed on the task:
1. Delete the task;
2. Complete the task;
3. Change task parameters: type, deadline, priority, executor;
4.type,
5.deadline,
6.priority,
7. performer;
8. Start the time tracker;
Deleting columns
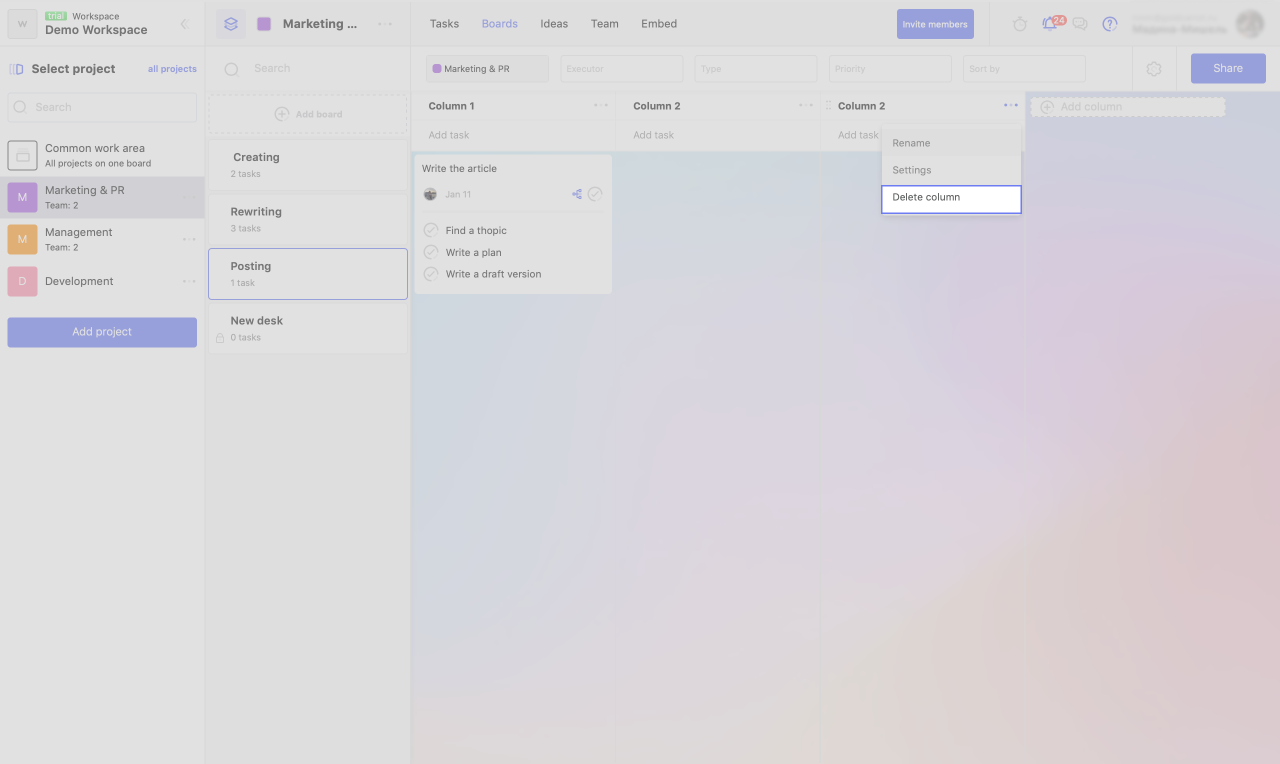
To remove an unnecessary column:
1. Click on the three dots next to the name.
2. Select "Delete Column".
3. In the window that opens, click "Delete column".
Attention: With the column, all tasks that are in it will also be deleted. It will be impossible to restore them.
Creating tasks
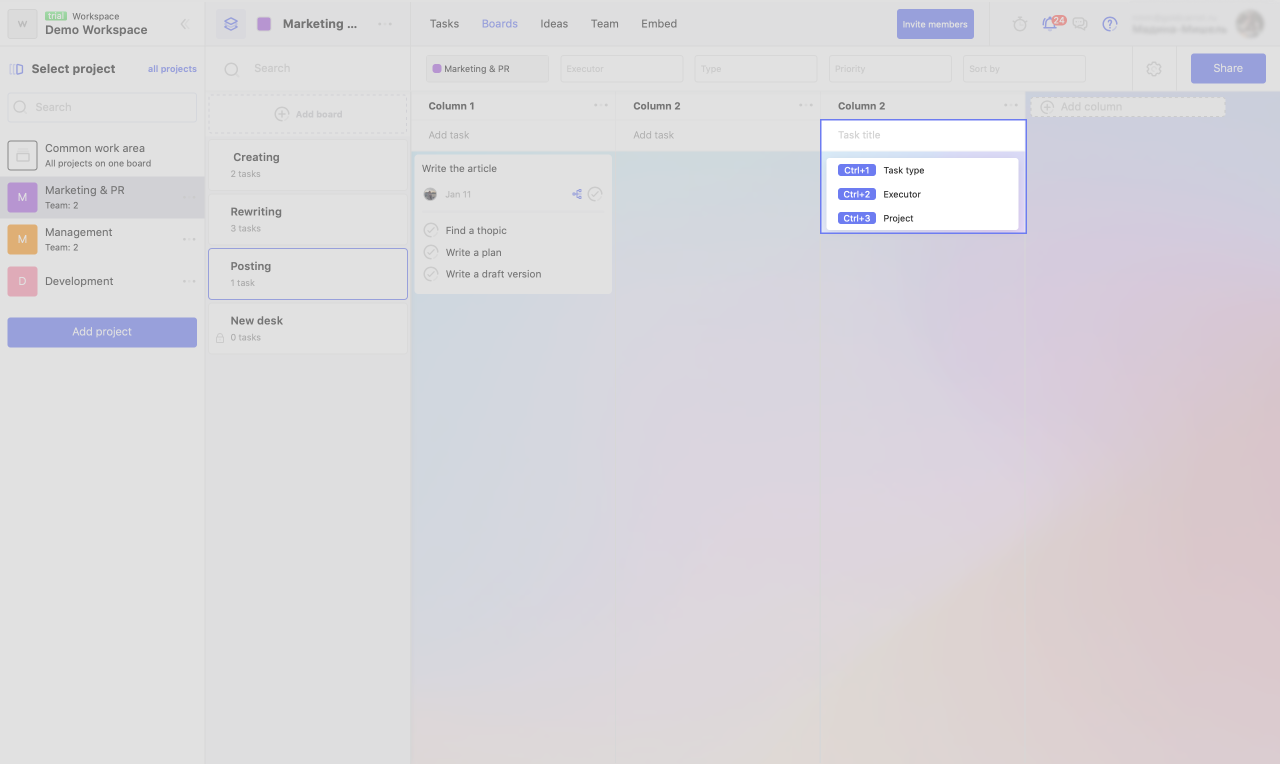
To create a task:
1. Place the cursor in any "Add task" field.
2. Write the name of the task.
3. Press Enter.
Read more about how to work with tasks.
Drag and drop tasks
Tasks can be moved between columns as between steps in a workflow. To do this, grab the task with the mouse cursor and drag it to the required column.
When you drag a task between columns, the value of the task changes in the "Column" field.
Search, filters and sorting
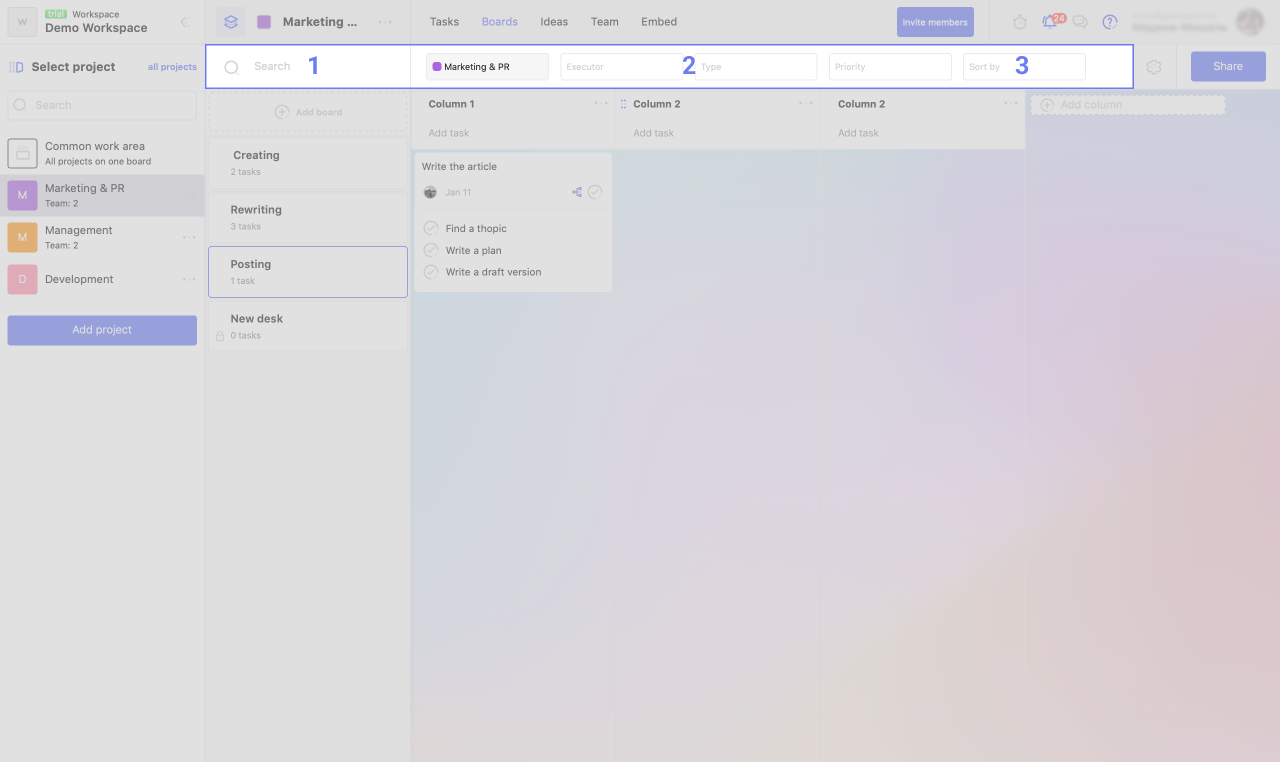
Above the main working window, you can:
1. Find the required task using the search bar.
2. Make a selection of tasks by project, executor, task type and priority using filters.
3. Change the task sorting parameter: manually, by importance, by time, by type, by duration.
There may be some information we haven't added yet. But you can ask us here:

